

Only the Cookie Monster would masterfully devise this crazy cupcake idea. Think about it. Who else would even DARE incorporate inevitably delicious cookies AND milk into a cupcake? Obviously a mad genius with a knack for milk and cookies. So we all know to blame this little monster when someone asks, "Who stole the cookie from the cookie jar?!" But shockingly, it wasn't the Cookie Monster this time around... Wait I think he knows who!
Oops! I stole the cookie from the cookie jar... of course, to make my Oreos 'n Milk Cupcakes with actual milk!
A few notes about this cupcake!
I ordered the Dobla dark chocolate liqueur cups from Amazon (follow the link to buy a set) since the idea of homemaking my own chocolate cups was far from my mind. If you choose to make them yourself, make sure to set aside extra time or make them a day before.
Also, the size of these mini Oreos is a big deal! Since you're going to want to be able to dip the mini cookies into the chocolate cup filled with milk, make sure you don't roll out such big "mini" cookies. The cookies WILL expand a bit while they're baking in the oven, so pre-estimate the size and roll it out smaller than the circumference of the cups. Since the mini Oreo cookies are homemade and pretty time-consuming to make, I would make them a few hours before you bake the cupcakes or even a day before. You can even buy the actual mini Oreos at the grocery store if you're on a time crunch!
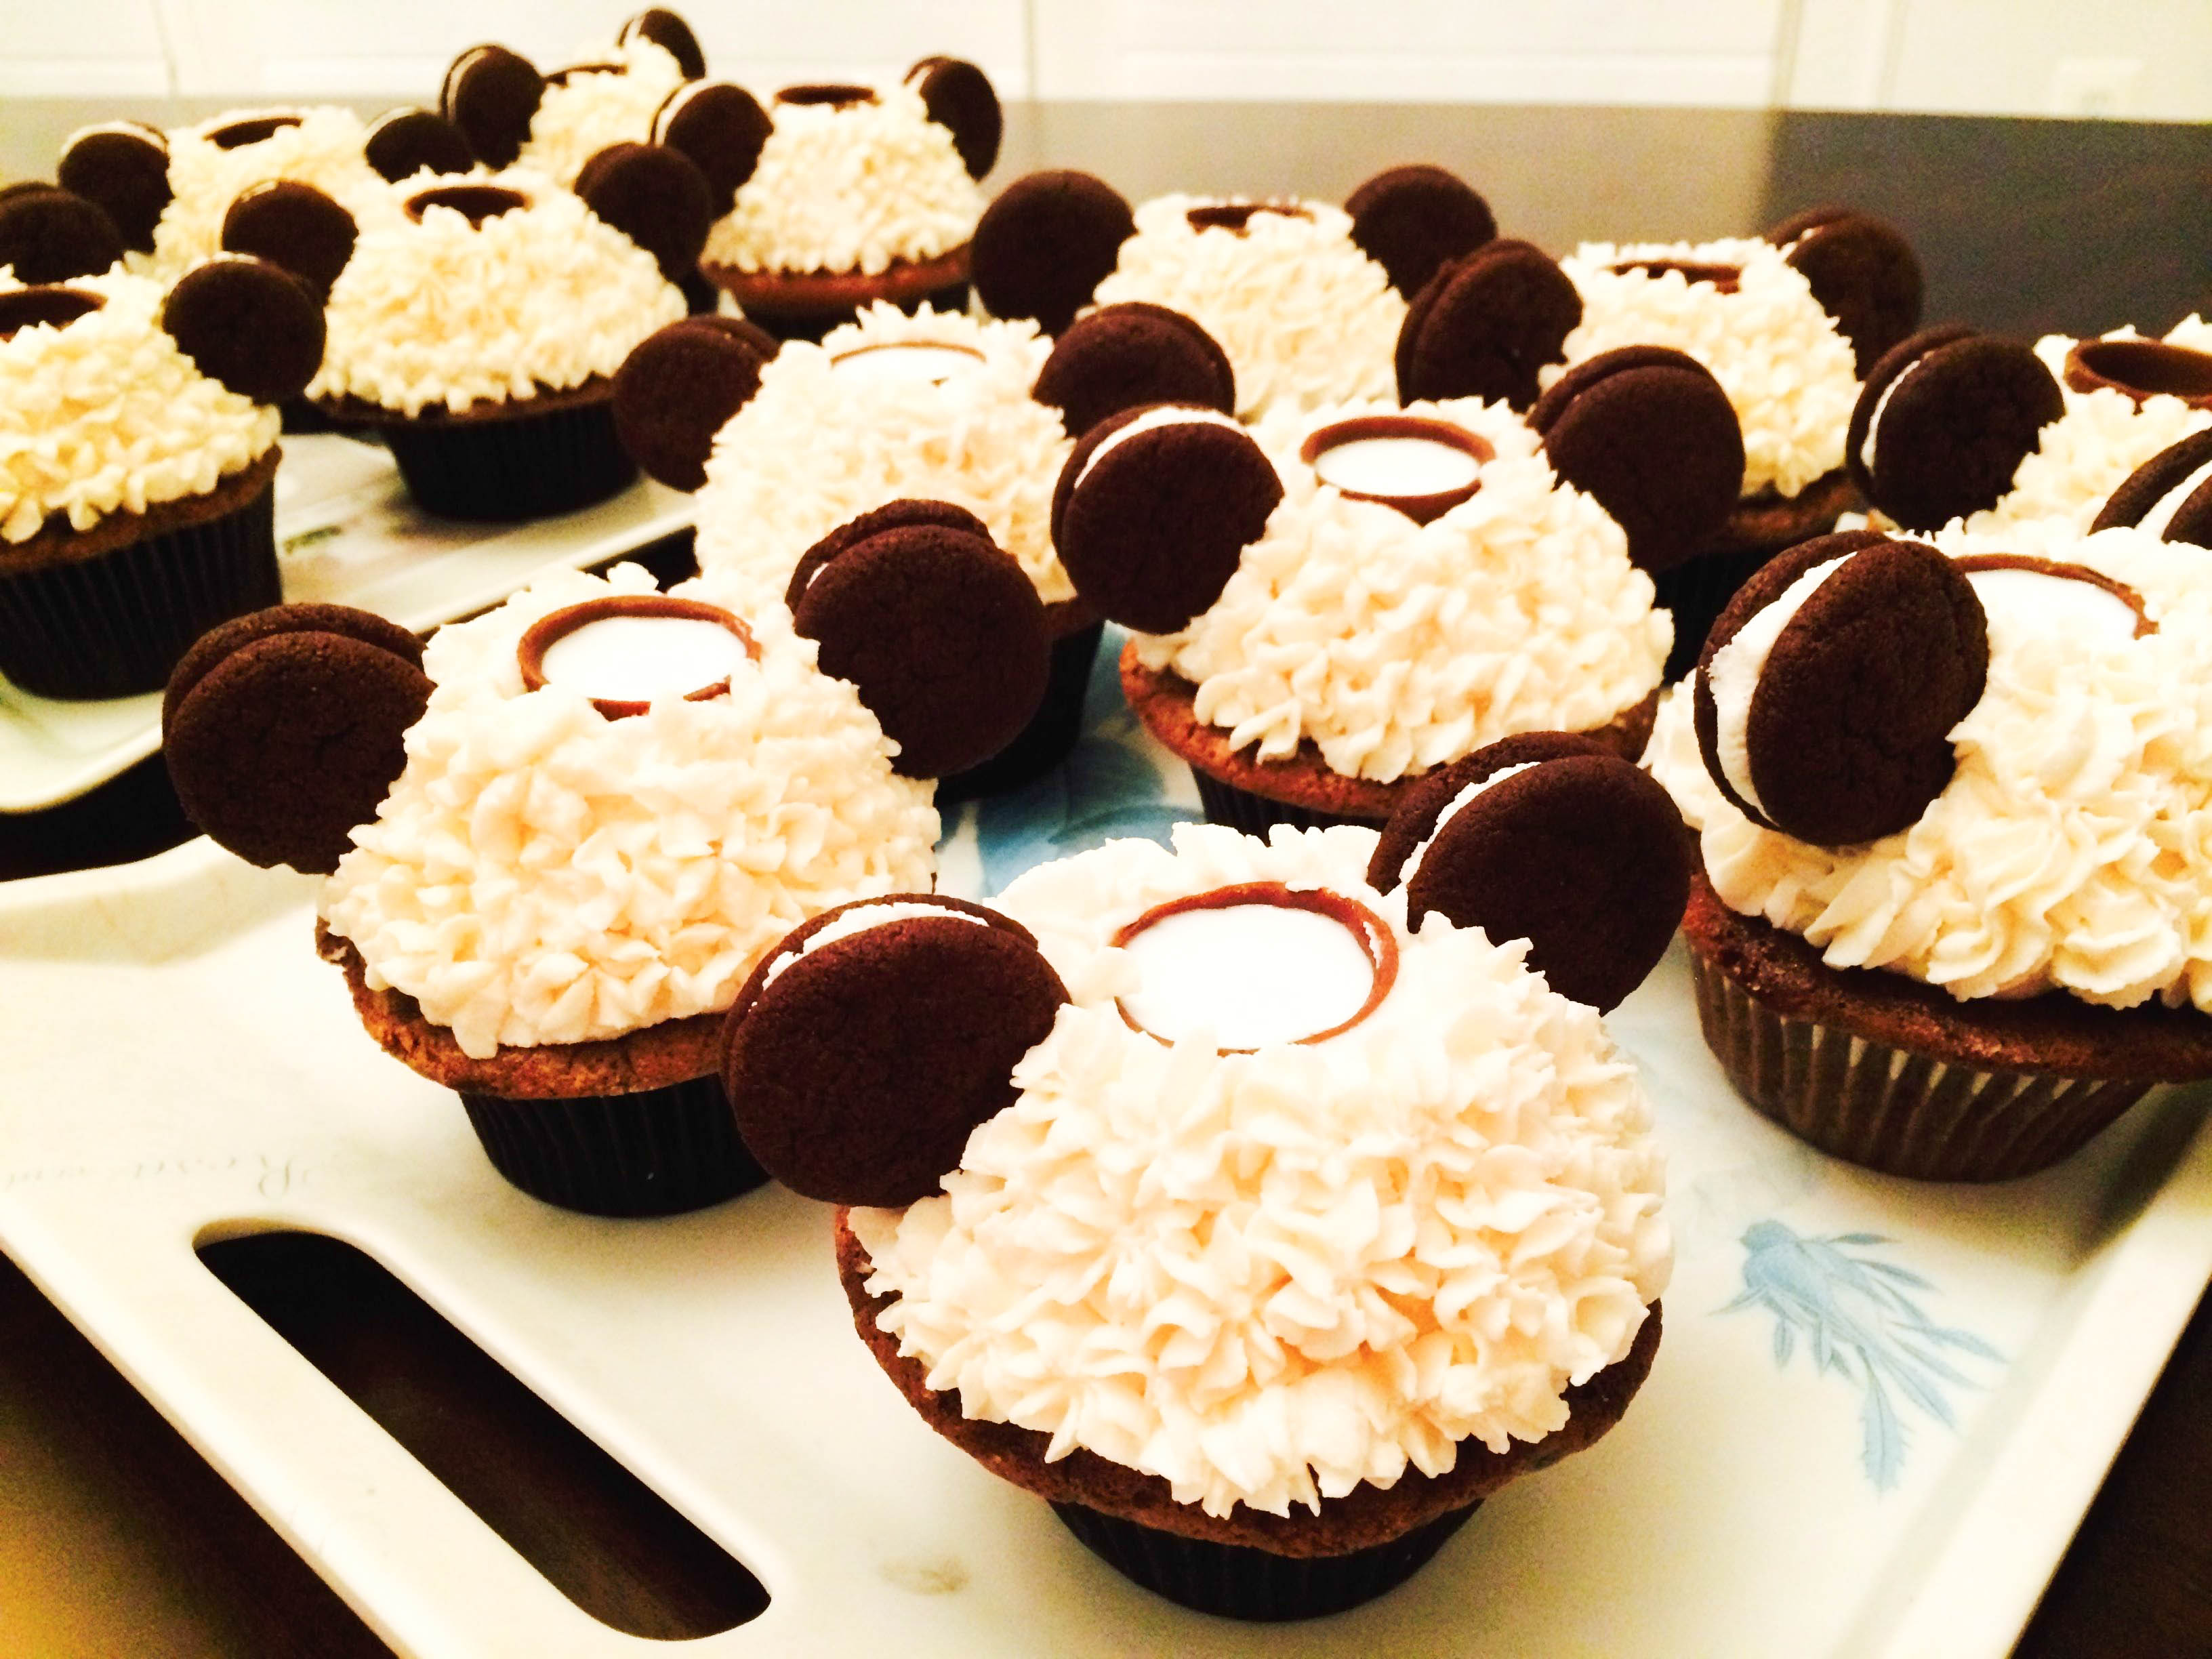
Now about the actual cupcake... From my personal experience of making these cupcakes, I recommend a nice and FLAT cupcake. I found that a cupcake with a flat plateau allowed me to peacefully place the chocolate cup (with a squirt of buttercream on the bottom as "glue") right on top. With a domed cupcake, I found a few inconveniences that were seen as problems to me:
- Taking a paring knife to create hollow holes for who-knows-how-many cupcakes (time-consuming)
- When I placed the chocolate cup into the hole, it wasn't tall enough to create the simple, yet beautiful buttercream design I had in mind
- When I placated the cup into the hole, the chocolate began to melt from the moisture of the cake
With the flat cupcake, I was able to avoid all of these problems. Follow me if you want to save yourself from trouble! But it's ultimately up to you on how you want to go about this.
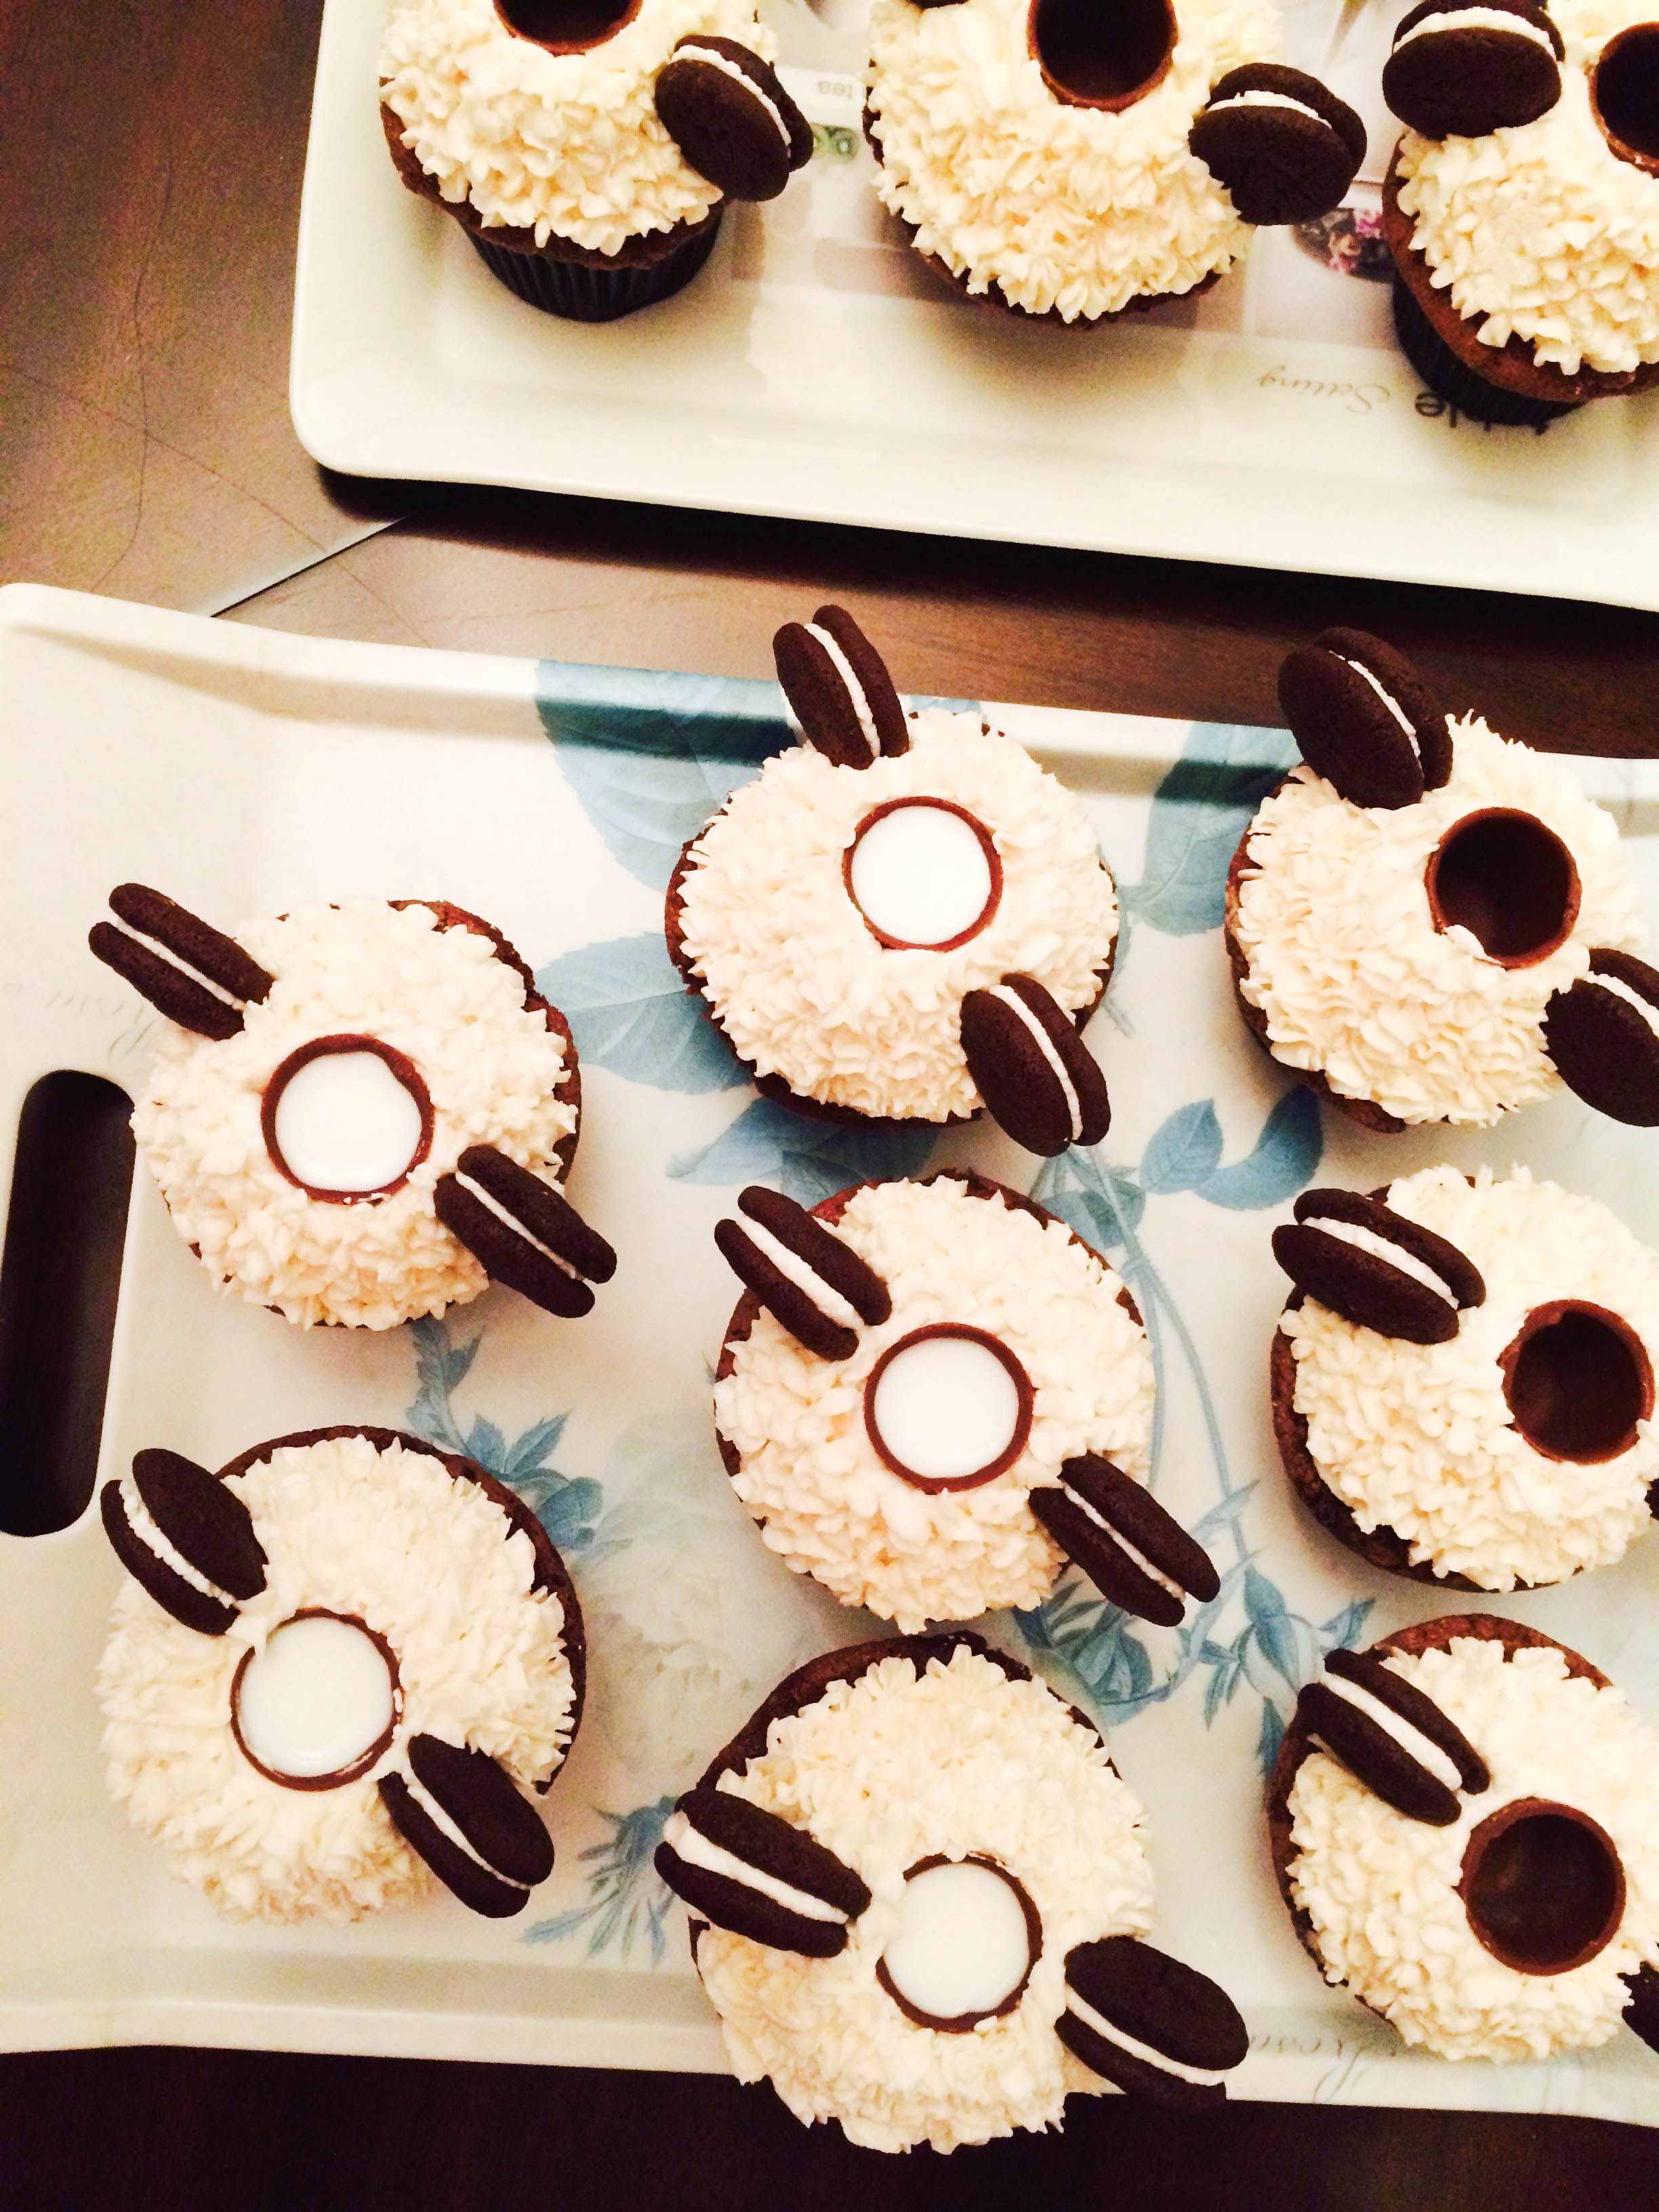
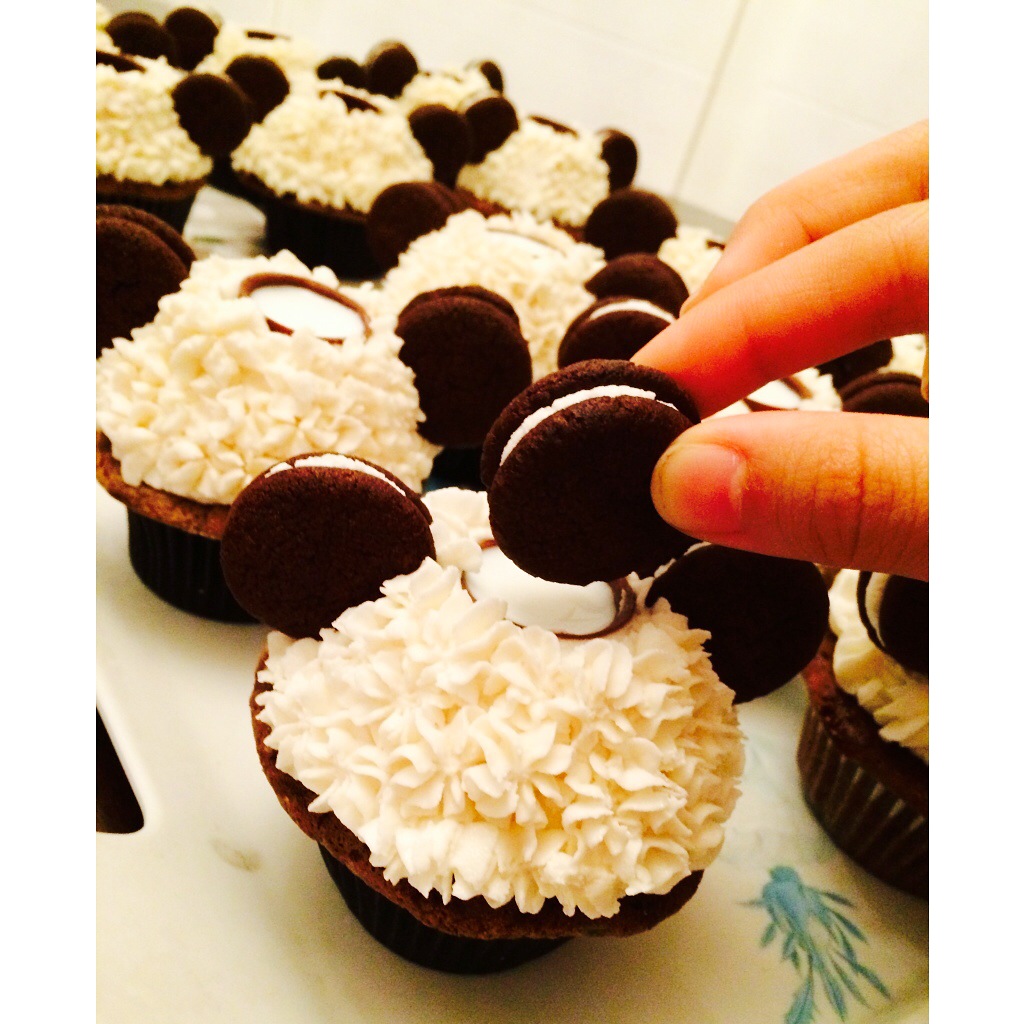
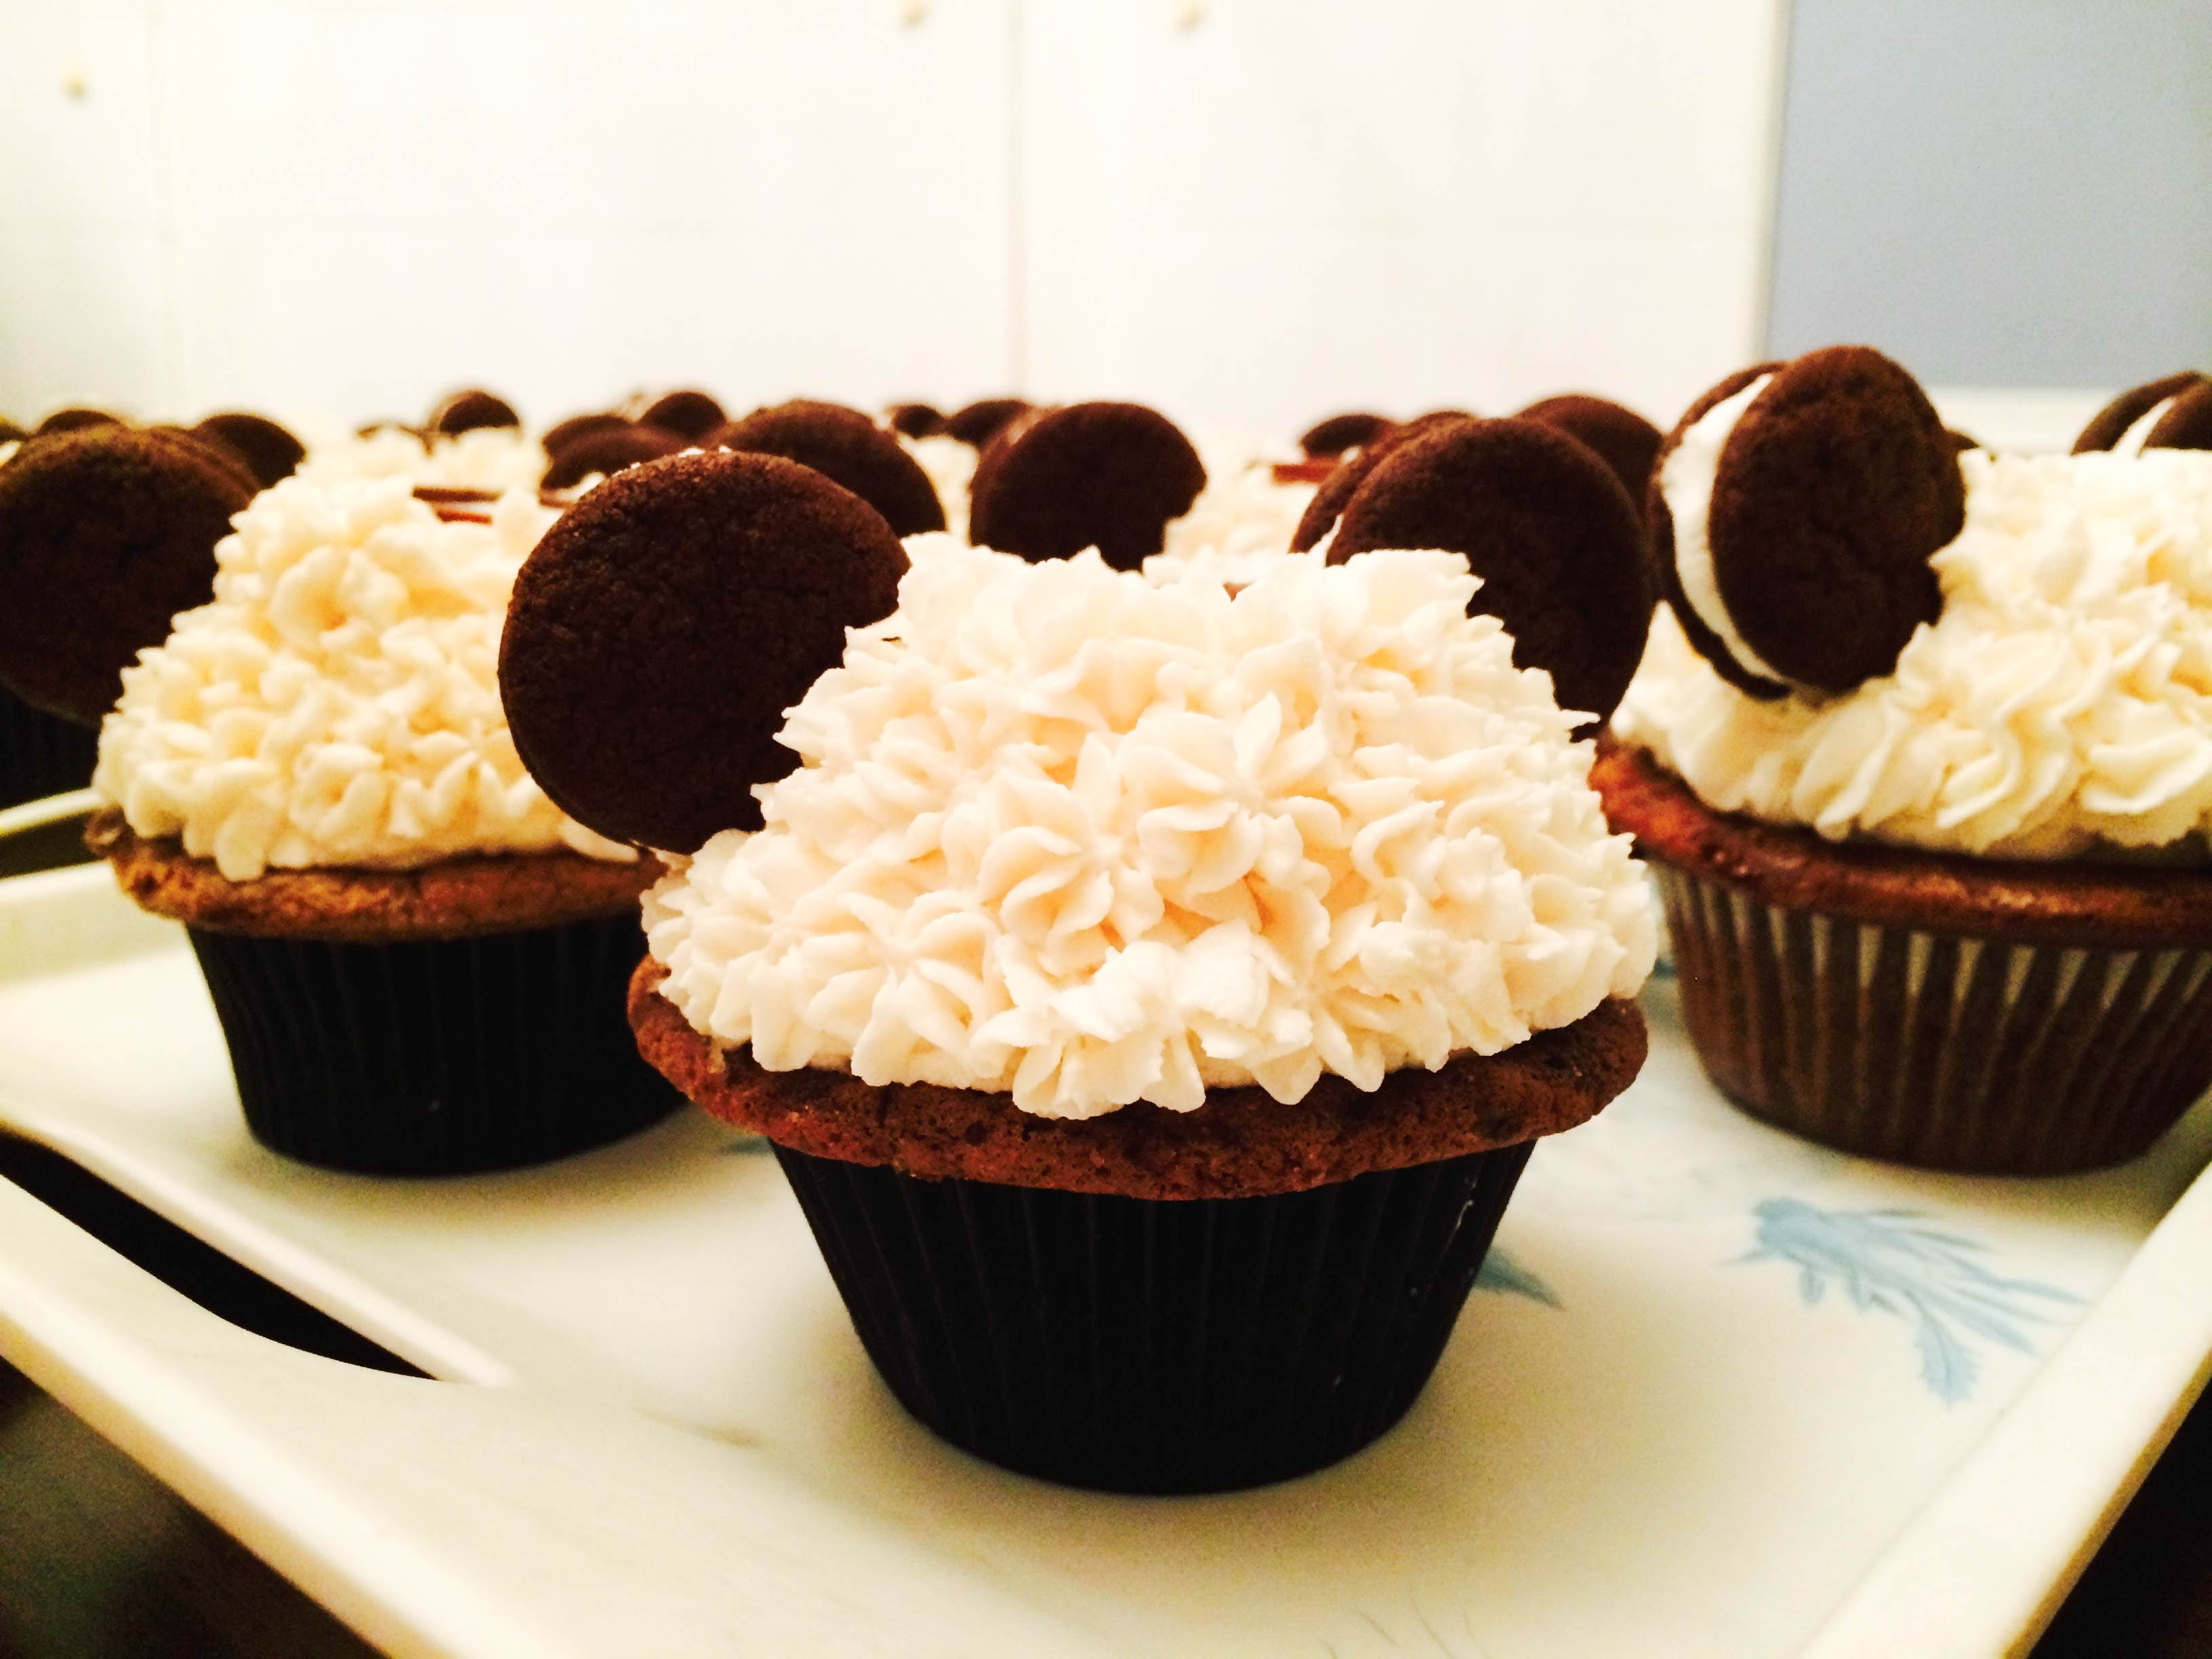
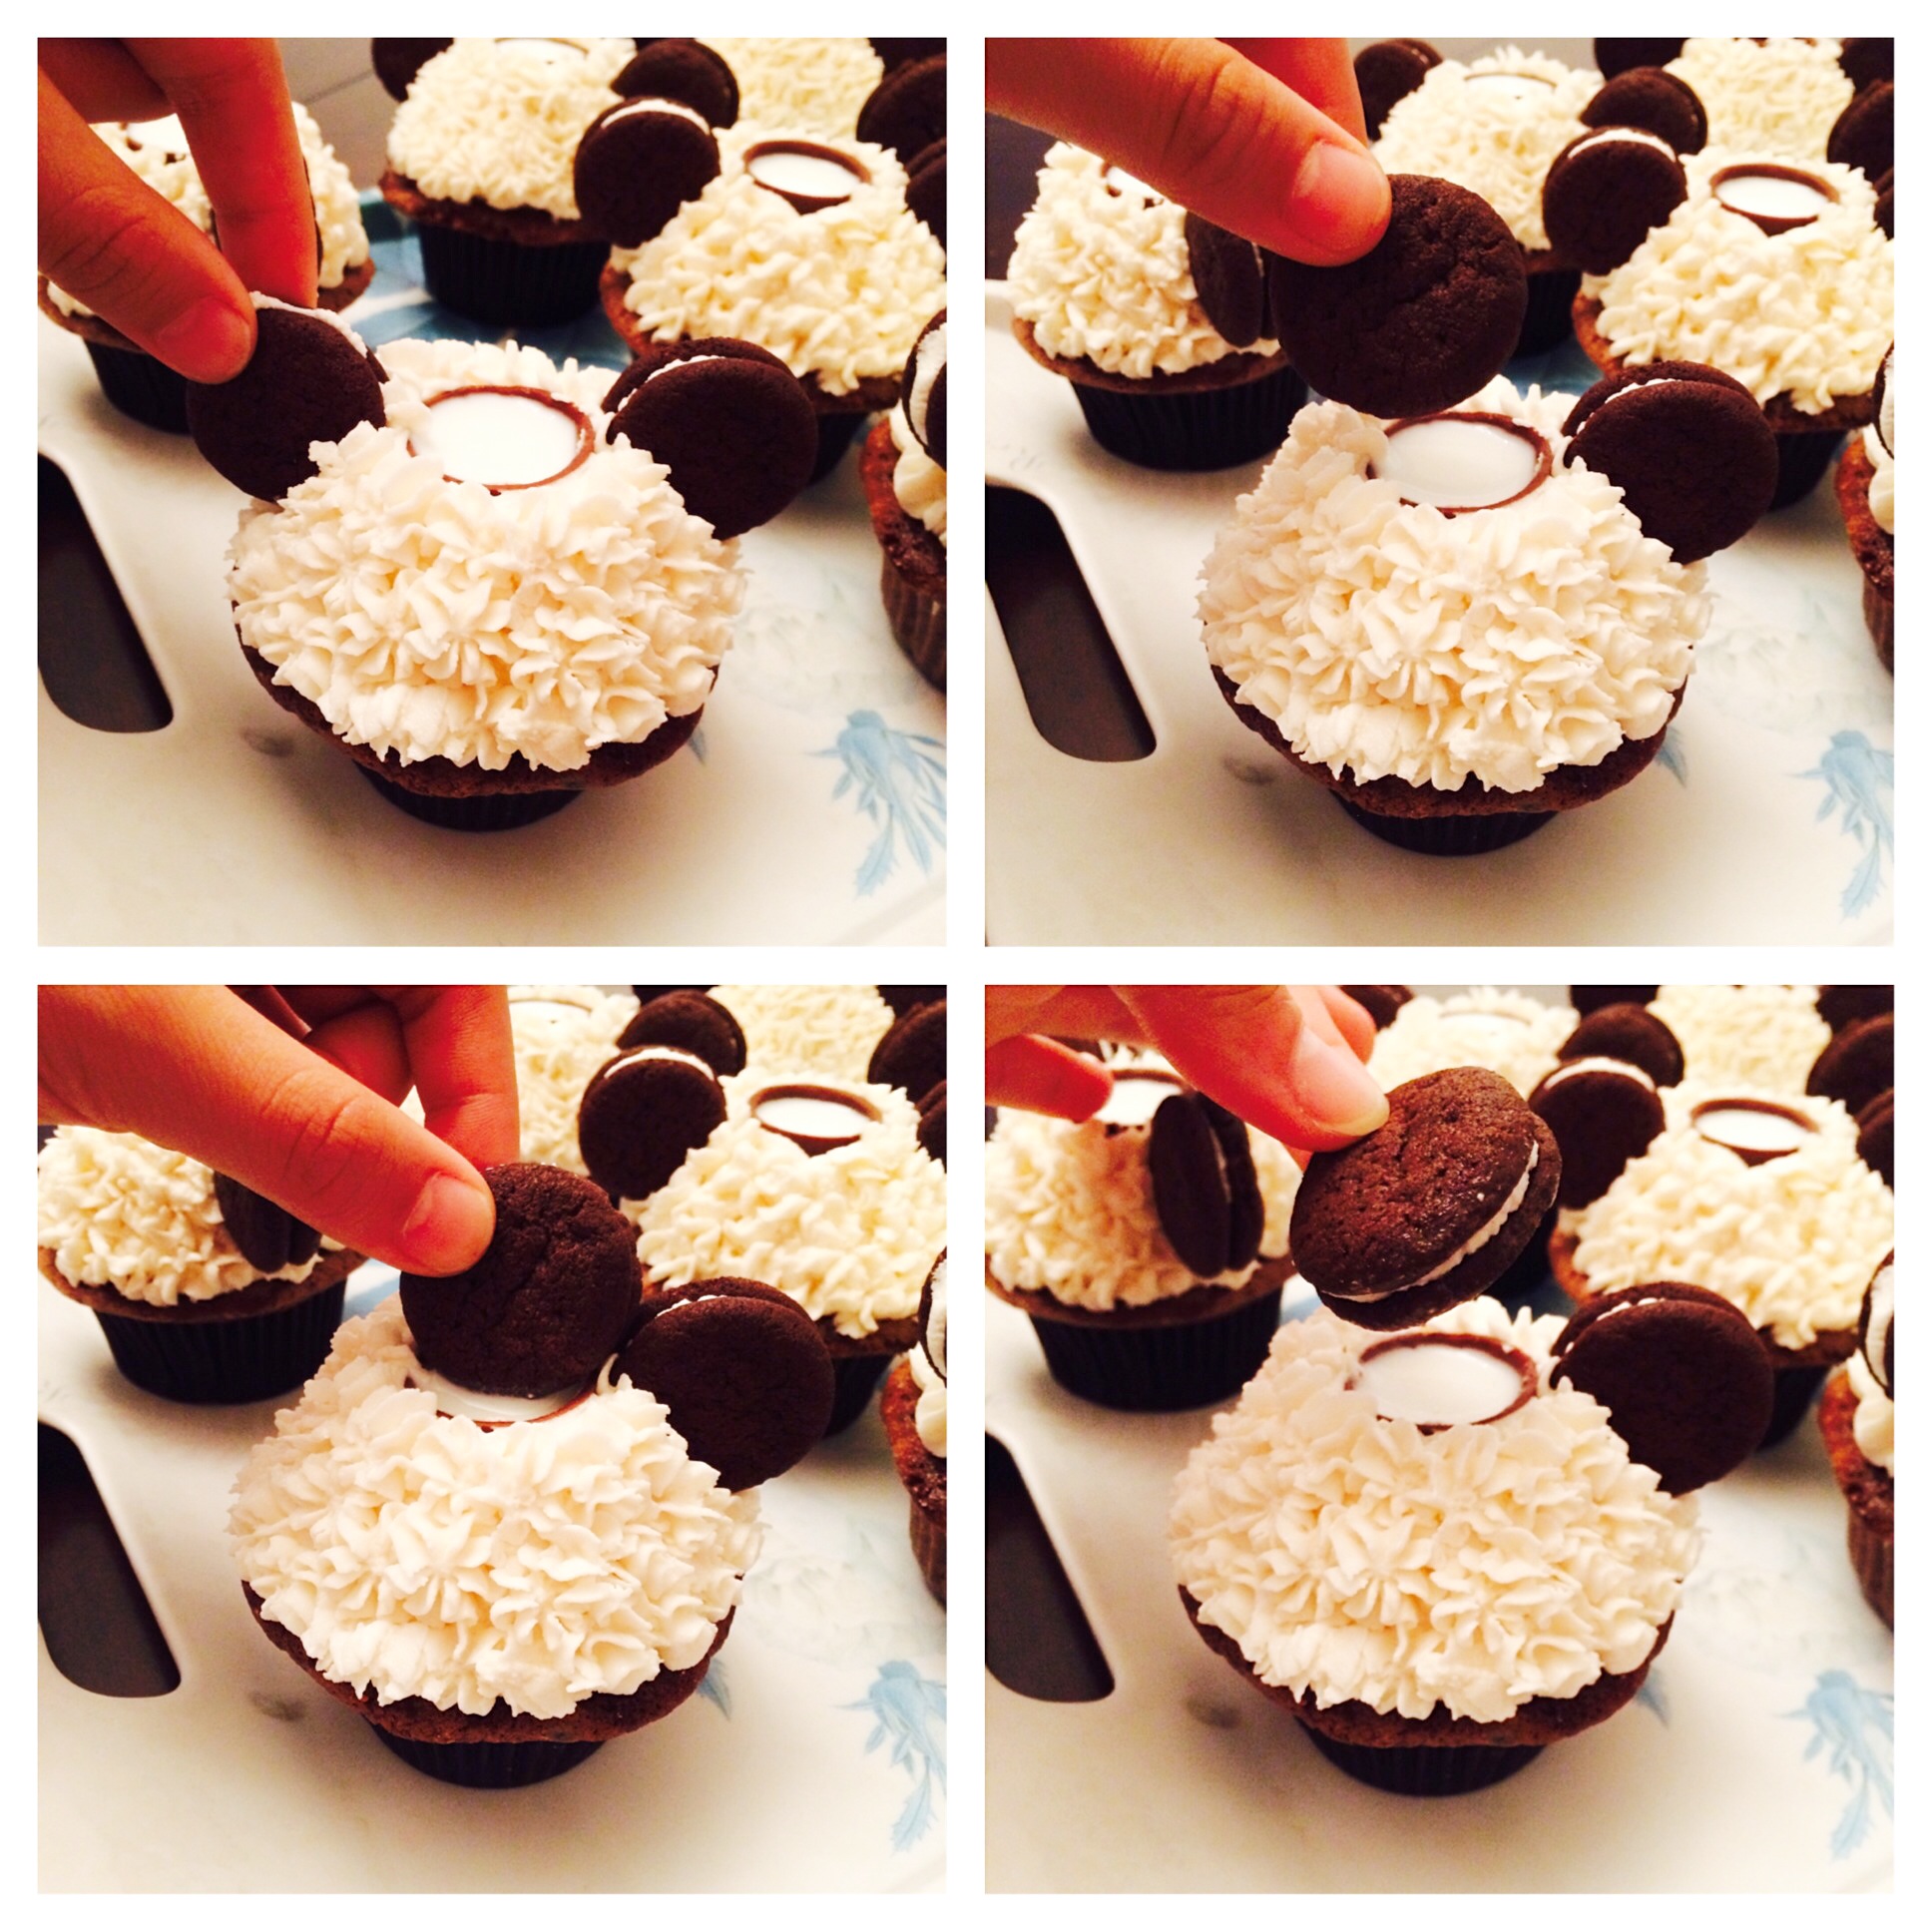
Now for decorations! I took one of my favorite small Wilton tips (you can use your favorite one) and piped a small design around the side of the chocolate cup, starting from the bottom and around. My goal was to create a dome shape with the buttercream since I opted out of making a domed cupcake. And I promise you, it is easy to achieve this as long as you have a steady hand! Then, attach two mini Oreos around the cupcake hehe at the end, they looked like Mickey Mouse ears.
When you are ready to attack these cupcakes with milk, make sure you use a small funnel to fill the cups up! I would advise you not to fill the cups until the minute you serve these cupcakes to avoid leakage. For example, if you're planning on sharing these at a party, don't fill the cups until the very SECOND you yell, "Cupcakes are served!" Not literally... But you know what I mean. ;)
Lastly, there are many ways to eat this cupcake. But, I believe there is only one CORRECT way of eating it. There is only one guideline: Finish the milk FIRST (by drinking it up, dipping cookies, etc.) before you bite into the cupcake to avoid a big milky mess! Luckily, I was able to sidestep this mistake. Hopefully you will, as well!
This idea may seem intimidating at first, but it gradually fine tunes itself into the progression of the dessert. The flavors cut through the rich vanilla buttercream right away. The milk, cookies, and chocolate constitute themselves into one stellar combination. If you don't think you would be able to share these cupcakes after, follow the wise words of Sir Cookieh Month-Sta:


Oreos 'n Milk Cupcakes with Actual Milk
- Yield: 24 1x
Ingredients
Oreo Cupcakes
- 2 ⅓ cups all-purpose flour
- 1 cup unsweetened cocoa powder (sifted)
- 1 ½ tsp. baking powder
- ½ tsp. baking soda
- ½ tsp. salt
- 12 tbsp. unsalted butter (at room temperature)
- 2 cups firmly packed light brown sugar
- 2 tsp. vanilla extract
- 4 eggs
- 1 ½ cups buttermilk (at room temperature)
- 1 ¾ cups plus 2 tbsp. whipping cream
- 3 tbsp. powdered sugar
- ½ tsp. vanilla extract
- 6 tbsp. Oreo cookie crumbs
- 24 Oreo cookie halves
Vanilla Buttercream
- 1 sticks (½ cup unsalted butter, room temperature)
- 1 ½ cups solid vegetable shortening
- 2 pounds 8 cups confectioners' sugar, sifted
- 2 tablespoons pure vanilla extract
- ¼ cups of milk
Mini Oreo Cookies
- 1 ¼ C all-purpose flour
- ½ C unsweetened cocoa
- 1 t baking soda
- ¼ t baking powder
- ¼ t salt
- 1 C sugar
- ½ C plus 2 T butter (room temperature)
- 1 large egg
Instructions
For the Oreo Cupcakes
- To make the cupcakes, preheat the oven to 350 degrees F. Line two cupcake pans with paper liners.
- In a medium bowl, sift together the flour, cocoa powder, baking powder, baking soda and salt; set aside.
- In the bowl of an electric mixer, beat the butter on medium speed until smooth. Gradually add the brown sugar and continue beating until fluffy, scraping down the sides of the bowl as needed. Beat in the vanilla.
- Add the eggs one at a time, beating well after each addition.
- With the mixer on low speed, add the flour mixture in three additions, alternating with the buttermilk, beginning and ending with the flour mixture. Mix just until all the dry ingredients have been incorporated, being careful not to overmix.
- Divide the batter between the prepared cupcake liners. Bake until a toothpick inserted in the center comes out clean, about 18-20 minutes. Transfer the cupcakes to a wire rack and let cool to room temperature.
For the Vanilla Buttercream
- In the bowl of a stand mixer fitted with the paddle attachment, beat the butter, crisco, and vanilla extract on medium speed for about 2 minutes.
- Turn the mixer down to low speed and gradually add in the confectioners' sugar (alternated with the milk) until it is completely incorporated.
- Turn off the mixer and mix on medium-high with a whisk for 8 minutes.
For the Mini Oreo Cookies
- In a medium-sized bowl, mix the flour, cocoa, baking soda and powder, salt, and sugar.
- Beat in the butter and the egg. Continue mixing until dough comes together in a mass.
- Take rounded teaspoons (or smaller) of batter and place on a parchment paper-lined baking sheet approximately 2 inches apart. With moistened hands, slightly flatten the dough.
- Bake for 9 minutes at 375 F. Set on a rack to cool.
- To make a cookie, pipe teaspoon-sized blobs of vanilla buttercream into the center of a cookie using a pastry bag with a ½ inch round tip.
- Place another cookie, equal in size to the first, on top of the cream. Lightly press, to work the filling evenly to the outsides of the cookie. Continue this process until all the cookies have been sandwiched with cream.
For Decorating
- Read my notes above.

Gabrielle (@Gabrielle4519)
These look AMAZING! but I don't cook with shortening. Do you think it would work with another frosting or ganache?
The Baking Spoon
Yes definitely! The shortening is used to crust the buttercream, but that isn't necessary. You can certainly make this an "all-butter" recipe! My favorite alternative is by substituting the shortening by using two full sticks of butter instead of 1 stick of butter and 1 1/2 cups of shortening. Instead of 1/4 cups of milk, use 1/3 cups! Hopefully, that should do the trick ;)
Julia
Awesome recipe! Love the butter cream! What restaurant have you had the best cupcakes? Remember to add it to your Besty List! http://www.thebesty.com/thebakingspoon