

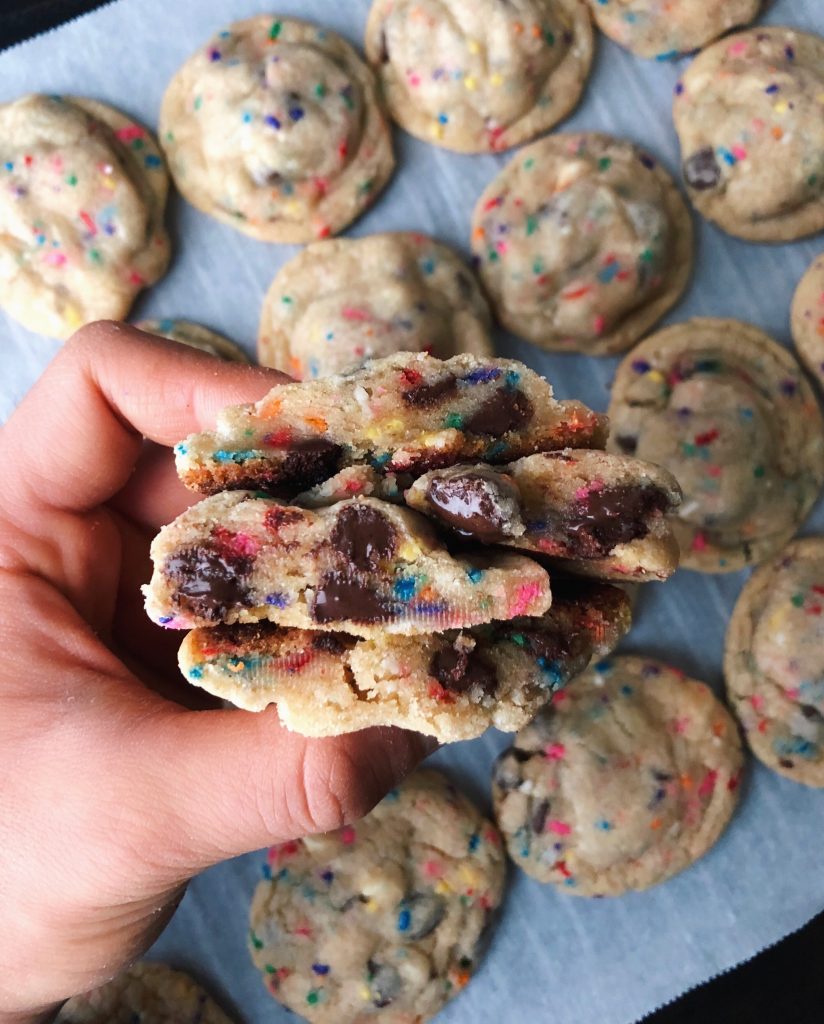
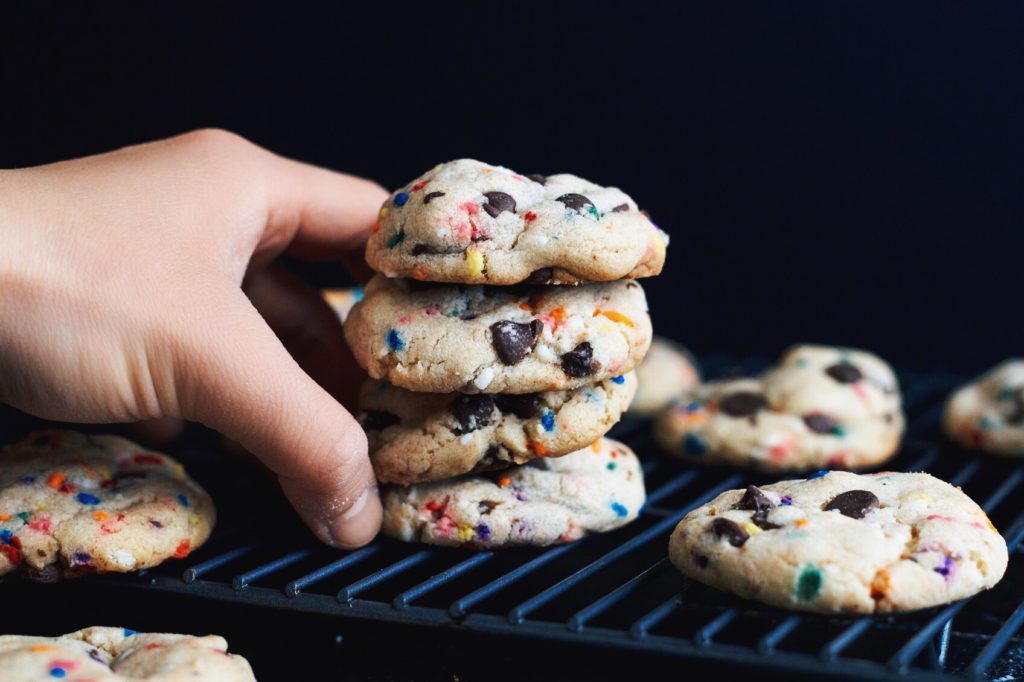
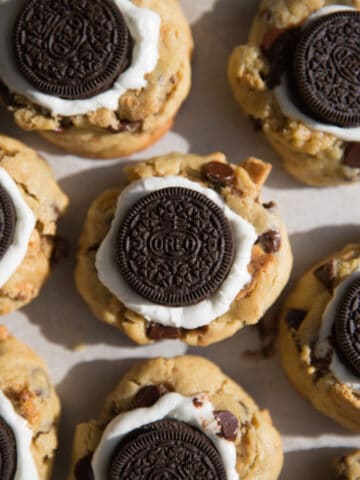
These homemade cookies are the perfect balance of soft and chewy, bursting with colorful sprinkles and a heavenly cake-like texture!
I was perusing my website after this one-year hiatus and realized my last blog post was the recipe for my Vegan Mini Poptart Cereal from March 2017. I remember that month so vividly. I was in the midst of creating some of my best content, and then the next month, well… life happened. And for me, it happened hard. It swoops in out of nowhere and starts wreaking havoc on all your plans for progress. It consumes you and you just can't do anything about it. Trust me, nothing life-changing occurred in my life. Just a slight clash of opposing passions with a pinch of negativity (thank you, Anna-esque mentality). Now it’s okay if you have a sudden urge to belt out “Wrecking Ball” right now. I completely understand. You take the high notes, I’ll take the low. Cue?
Now you’re waking up a year later only to realize that you haven’t created an ounce of new content, stopped responding to all your emails, and neglected your social media profiles. Maybe even their passwords, like don’t get me wrong. Getting locked out of my accounts was the greatest excuse for not making my social presence more known. Yup. I went off the grid. And I felt pretty terrible about it. It went so far as to making me feel overwhelmed, cornered and deflated, as well as defeated. Fear won over faith and I was really wondering why. Well, it's March 2018 now. Exactly one year has passed. After this recent hiatus from baking, I’ve had the opportunity to reassess my life goals and creative priorities. What am I doing now? Am I happy? What’s stopping me in my tracks?
I talked about this in one of my Instagram posts, but as some of you know, perfectionism is my biggest weakness. When my expectations for everything being perfect don’t match up with reality, I blame myself and give up. Or get stuck. I simply just stop from fully extending myself. This self-imposed pressure to amount to something... Sometimes, it’s just too much for me. But it’s time to surrender. To accept where I am at the moment, knowing that I am just a work in progress. It’s about slowly learning to embrace imperfection, appreciate failure and celebrate every small accomplishment. 2018 looks like a good year for that :’)
So thank you. Even though I wasn’t here, you guys were. I honestly see each and every one of you. Your support through visits, messages, follows, likes and comments are so so appreciated, forreal. And if you're reading this, yo. You are the real MVP in my baking story.
</endsappypost>

Now time to celebrate with the recipe to the softest and chewiest cake batter cookies (was going to make a healthier alternative, but awww whatever, I was feeling my sprinkles hehe). Prior to this, I've tested and tried many recipes that used box cake mix with all-purpose flour to make the cookies cakey and soft. I'm not a big proponent of box cake mixes, so decided to create a version that stresses better cookie-making techniques and quality ingredients to create that perfect, tender cookie. As you guys may already know, baking isn't only an art, but it's a science as well. Various ingredients and techniques can change the overall texture, taste, and appearance of your cookie. Tessa from Handle the Heat does a fantastic job of explaining the anatomy of the cookie and how to make your ideal batch. These are some of the most important ingredients and techniques I employed in this recipe to create these soft and chewy funfetti cookies from scratch:
Tools
- Stand mixer with a paddle attachment - Useful for creaming the butter with the sugar.
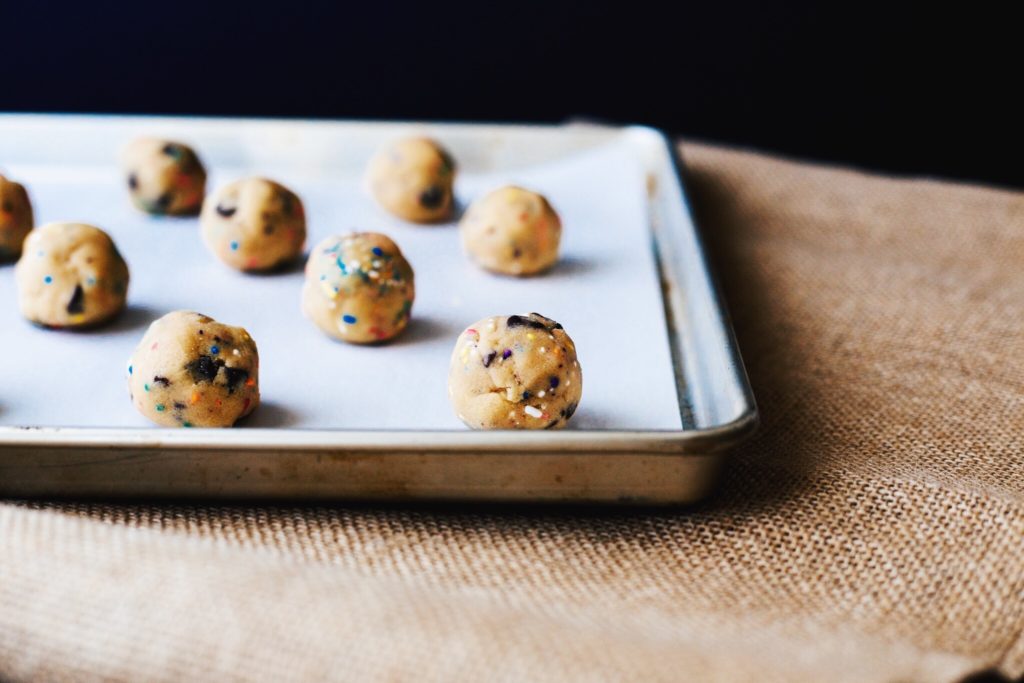
- Kitchen scale - Used to measure out most ingredients in my recipe. It's also used to carefully measure each portion of cookie dough to ensure uniform cookies and to avoid having remaining dough at the end!
- Cookie scooper - If you don't have a kitchen scale, you can also use the 2-tbsp or 3-tbsp cookie scooper to measure out your cookie dough balls.
- Baking sheet - You'll of course need a baking sheet to bake the cookies on! I recommend this one so you get perfectly baked and easily removable cookies.
Ingredients
- Unsalted butter - Make sure this is at room temperature. Using room temperature butter in cookies ensures proper creaming with sugars, creating a light and fluffy texture. The softened butter incorporates more air, promoting better distribution of ingredients.
- Extra egg yolk - The extra yolk has amazing emulsifying abilities and the fat content helps to bind all the ingredients together. This process helps to create a more homogenous mix. And also some thicker, velvety cookies! Make sure they are at room temperature before using.
- Granulated Sugar - Granulated white sugar is hygroscopic, so it attracts and absorbs the liquid in the dough. This slows down the development of the gluten, which makes the cookies crispier.
- Brown sugar - Also hygroscopic, but it contains molasses that adds moistness to a cookie. This recipe uses more brown sugar to make for a chewier, softer, and denser cookie. It’s about finding the right white to brown sugar ratio.
- Cornstarch and baking soda - Cornstarch is used as a thickener, and when used in combination with flour, it can “soften” the hard proteins in gluten. This yields a more tender cookie with the perfect crumb.
Tips and Tricks
- Do not shortcut the creaming process. Cream your butter and sugar for at least 5 minutes on medium-high. This creates air pockets in the dough, which results in fluffier cookies.
- When you add in the dry ingredients, mix until just incorporated. The less you mix, the softer the cookies will be. Overmixing your dough will make denser cookies. On the flip side, do not undermix. You don’t want to get pockets of egg, sugar, and butter in your dough. Embrace the scrape!
- Chill the dough prior to baking. This process allows the flour to absorb the liquids completely, which prevents the cookies from spreading out while baking. This will produce cookies that are slightly thicker, darker and richer in flavor. I normally chill my dough overnight (fail-proof, creating the PERFECT batch every time), but if you’re on a time crunch, 2 hours in the fridge usually works just as well. Really short on time? 30 minutes in the freezer. This isn’t mandatory, but highly recommended!
- Do not overbake (9-10 minutes in the oven). Every oven is different, so after 9 minutes, check to see if the cookies look just about done (just under being brown around the edges; should look white and soft, but not “raw”). Do not overbake the cookies, even if they look underdone! You may be tempted to keep them in the oven for longer, but they will firm up while they cool. These are meant to be white, soft, tender and chewy. Not brown and crispy!
Storage Instructions
- Storing - You can store them for up to 5 days in an airtight container in room temperature. Storing them in the refrigerator will dry them out! To reheat, preheat your oven to 350°F instead and heat for about 5 minutes until they’re nicely warmed!
- Freezing cookie dough - If freezing the dough, shape it into individual cookie dough balls and place them on a lined baking sheet. Once frozen, transfer the dough balls to a freezer-safe bag. When ready to bake, simply place the frozen dough balls onto a baking sheet and add a few extra minutes to the baking time.
- Freezing baked cookies - Baked cookies can also be frozen in an airtight container or freezer-safe bag. Make sure the cookies are completely cooled before freezing, and label with a freezing date. These cookies will last for up to 3 months in the freezer, but we guarantee you’ll eat them all before then!
Soft and Chewy Funfetti Cake Batter Cookies
- Yield: 10-12 cookies 1x
Description
These homemade cookies are the perfect balance of soft and chewy, bursting with colorful sprinkles and a heavenly cake-like texture!
Ingredients
- 250 g all-purpose flour
- 2 tsp cornstarch
- ¼ tsp baking soda
- ¼ tsp baking powder
- 1 tsp salt
- 227 g unsalted butter, room temperature
- 100 g granulated sugar
- 150 g light brown sugar
- 1 egg + 1 egg yolk
- 1 tsp vanilla extract
- 200 g sprinkles
- 170 g chocolate chips
Instructions
- In a medium bowl, mix the dry ingredients together. Set aside.
- In the bowl of the stand mixer fitted with a paddle attachment, beat the butter and sugars together for 5 minutes on medium-high speed until well-creamed and fluffy. Scrape down the sides of the mixer as necessary. Then beat in the eggs one at a time. Add vanilla extract and mix.
- Add in your flour mixture and mix until just combined. Scrape the sides of the bowl to avoid pockets in dough. Mix in chocolate chips and sprinkles. Do not overtax!
- Chill the dough overnight or for 2 hours in the fridge.
- After chilling the dough, get the oven ready and preheat at 350 degrees F.
- Shape the chilled dough into balls (2 tablespoons) and space them 2 inches apart on the cookie sheet. Bake for 9-10 minutes or until done. Allow cookies to cool for 10 minutes, then transfer to a wire rack to cool completely.
- Can store cookies at room temperature in an airtight container for up to 5 days.
Sophia
Love all of the tips and amazing photos as always
Bruce Deniger
exactly.You tips were really helpful, and thanks for sharing easier recipes.
Taltos
when's the second take of Serenade of the Infestor coming out?